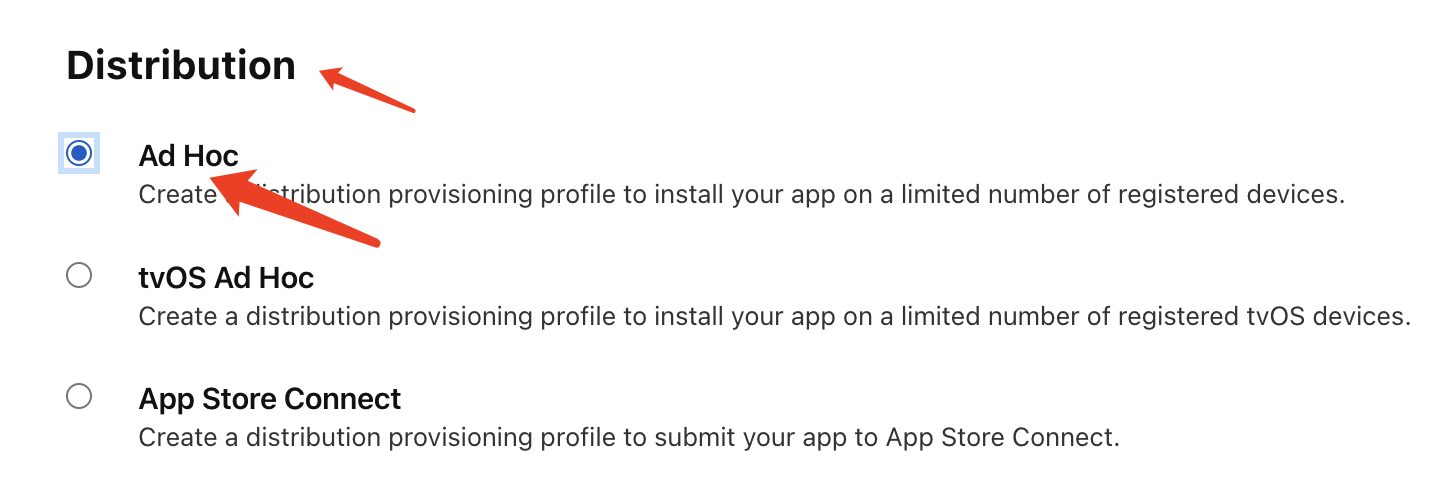
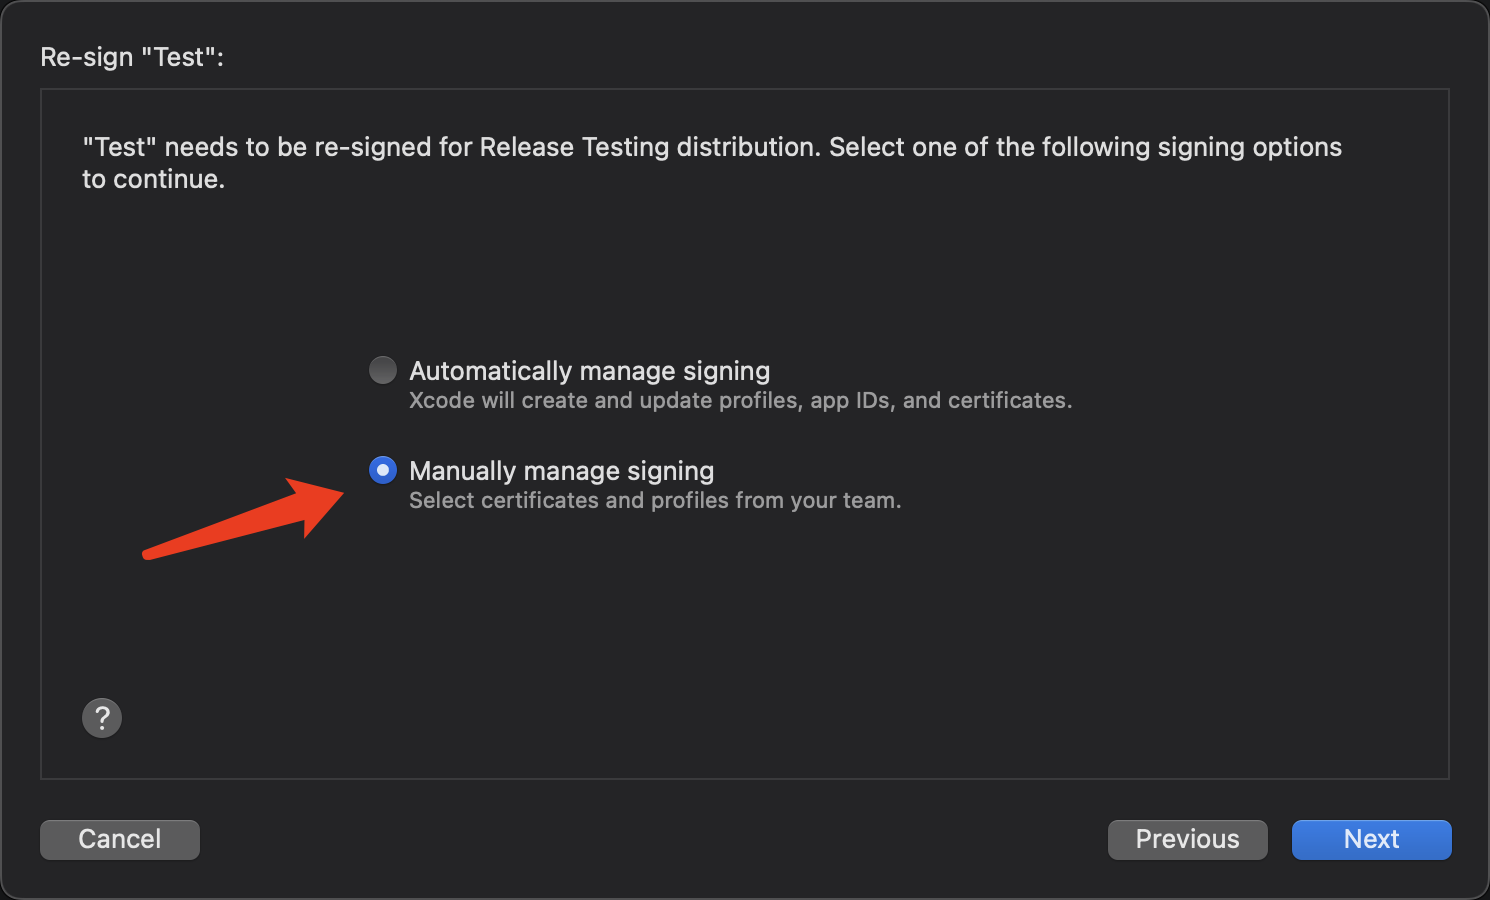
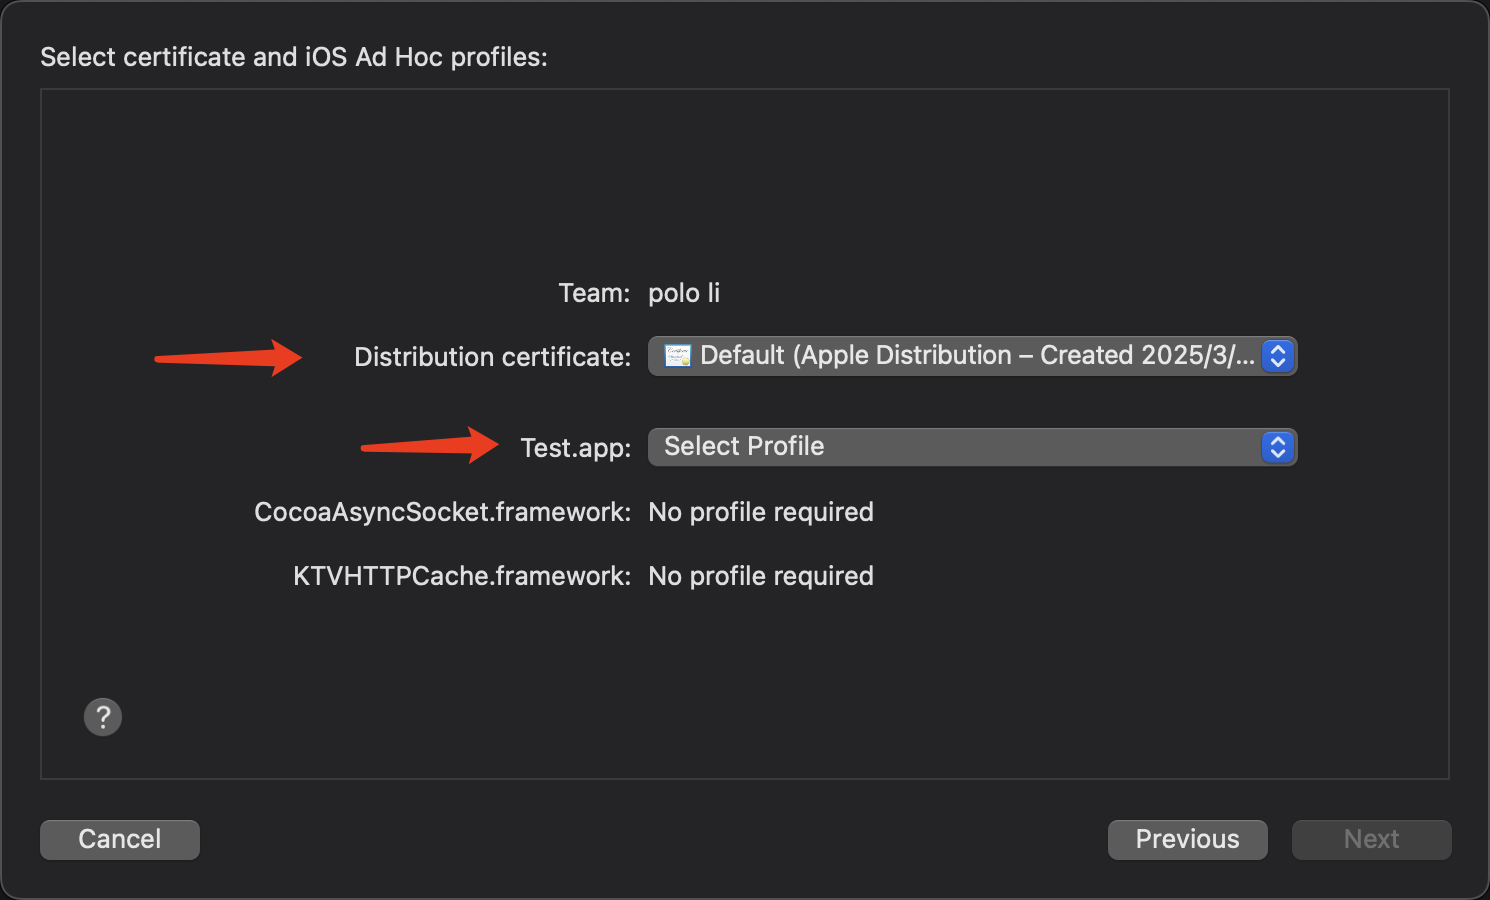
Distribution
Pgyer internal test distribution service is a leading mobile application internal test distribution platform in China, dedicated to providing easy-to-use App internal test distribution services for mobile developers and test users.
Upload App
Quickly upload the app to the platform

Price
Quickly get the service price

UDID
Get iOS device UDID in one step


Pgyer Open API
Easily manage apps with API

Pgyer applet
Manage upload apps easily

Mac Speed Uploader
Quickly upload app to Pgyer

Fastlane plugin
Upload app to Pgyer using Fastlane plugin

Jenkins plugin
Use it to upload app to Pgyer

App ICP record
Professional fast filing

Icon online production
Simply make your own app icon

Icon/startup cropping
Auto Crop iOS/Android App Launcher

Plist online production
Simply fill and instantly created

Bug Seek
Get test report within 48 hours

Compatibility Test
We have thousands of primary real machine

Security Test
Ssecurity risks and provide repair suggestions

App hardening
Prevent app decompilation and secondary packaging

Privacy compliance
More than 95% privacy compliance review pass rate

Android Upload Apps
Upload more than 20 app stores at once

ASO optimization
Let the APP be seen by more real users

Text QR code
Static/dynamic text QR codes

URL QR code
Quickly open the web page

Document QR code
view/download files anytime, anywhere

Picture QR code
Display pictures in various formats

Audio/video QR code
Scan the code to watch

Business card QR code
Scan the code to save the business card

App QR code
Scan the code to download and install the App
Services
Pgyer Developer Service Platform is committed to providing excellent upstream and downstream services for developers, addressing the various needs of developers throughout the developer life cycle.
Tracup

A next-gen task management service.

CodeFever
Efficient enterprise-level Git management tool

Bug Seek
Get test report within 48 hours
Compatibility Test
We have thousands of primary real machine
Security Test
Ssecurity risks and provide repair suggestions
App hardening
Prevent app decompilation and secondary packaging
Privacy compliance
More than 95% privacy compliance review pass rate
Android Upload Apps
Upload more than 20 app stores at once
ASO optimization
Let the APP be seen by more real users

Software copyright
Quickly obtain software copyright


Web Monitoring

Monitor your website in real time in all aspects, help to fix problems quickly, maintain website quality, and guide to improve user experience.
running status monitoringabnormal information summaryperformance test report

Small Program Monitoring
One line of code, the same integration method, easy to handle the integrated monitoring of small programs on various platforms.
WeChat Mini ProgramAlipay Mini ProgramDouyin Mini ProgramEasy Integration

Game Monitor
The game performance monitoring platform is a cloud service that monitors and analyzes game performance and faults in real time, helping game developers quickly locate and analyze problems.
Cocos Creator Massive throughputAuto detectionSmart analysis
CodeFever
The public cloud version of the code warehouse platform provides light, stable and efficient code management services.
Cloud WarehouseBranch ProtectionCode ReviewSecurity

CodeFever Community
A completely free and open source code hosting warehouse, with independent control over installation, deployment and code management.
Totally FreeMIT License Open SourceIndependent Intellectual PropertyQuick Installation


 Tracup
 Scan QR code to follow
Pgyer WeChat Official Account


Get the latest news, official benefits, promotions and other information